Deep Dive Into Video Shooting, Editing, and Sharing as a DJ
I have gone through many iterations on how I shoot, edit, and share video over the years, but I think my process is now refined into a really proven system. So let’s get deep into all of it: the equipment I chose and why, what I do the second I get home, how I run my edits, and ultimately how I get everything up onto social.
First, a big disclaimer. I am not a professional videographer. What I do have is a long photography background, both professional and amateur, and I have carried a lot of those instincts over into how I shoot video for my events. A lot of this is really about getting past “just point the iPhone and hope.” Nothing wrong with the iPhone, and if you are not shooting any video yet, that is exactly where you should start. But as a working DJ I know I am going to miss moments, so my whole philosophy is to capture as much footage as possible and then sift through it later at home. Buckle in, this is a long one.
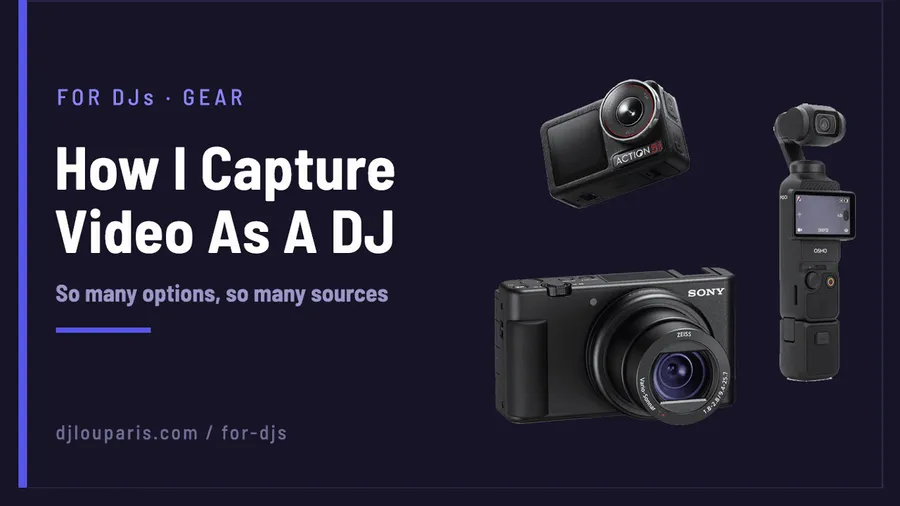
Update: this article and its video reflect my Sony ZV-1 era setup. I have since augmented my rig with a DJI Osmo Pocket 3 and a DJI Osmo Action 5 Pro, noted in the rundown below. A fully updated video and writeup are on the way.
The iPhone Still Has A Seat At The Table
I still use an iPhone from time to time right at my booth. I will set it to the wide angle, which is great in a shallow room for an interesting perspective, and I let it record audio so I catch any errant conversations that happen up at the booth. I currently run an iPhone 14 Pro, and I have an iPhone 13 with a cracked screen whose camera is still perfectly good. The point is, there is nothing wrong with an iPhone. Just know its capabilities and its limitations.
Why I Shoot Sony, And The ZV-1 Specifically
I have run through a lot of cameras over the years and I have settled on Sony as the king of the crop, especially for low light. Their sensors are just really good, and even on their lower end bodies like mine you get excellent low-light performance in a relatively affordable package. That matters enormously at receptions, which are dark more often than not.
My camera is the Sony ZV-1, and I want to be specific here: this is the original ZV-1, the Generation 1 body, not the newer ZV-1 II. I run two of them.
My Two-Camera Setup
The gimbal camera (the creamy footage)
One ZV-1 lives on a gimbal. I first experimented with this at Harvest of Sound and I love how it feels. This is my secondary camera, the one I use to get those smooth, creamy moving shots, grabbing it in and out of the booth and getting right into the action. The gimbal has an internal battery that controls the pan, tilt, and record functions, but it will not last nearly long enough on its own, so I run an external 10,000mAh battery (I keep two) out through USB to USB-C into the side port. It even threads in so I can use the whole thing as a stabilizer as I walk through the crowd.
The camera on a stick (the steady capture)
The other ZV-1 goes on a tripod. This is my “camera on a stick” approach. With a battery, the cage, and a big 256GB memory card, it records for hours. The entire purpose is steady, continuous capture. I will nudge the angle from time to time so it does not get dull, maybe zoom in ever so slightly, but mostly I just want as much footage in the can as possible.
A key detail: I record in 4K but output at 1080. The reason is room to crop. If I want to push in on a moment at 200 or even 300 percent, I still have the pixels to do it without the final video going soft. So be mindful of how you record, how close you can get to your subjects, how much post you want to do, and how many angles you are juggling. The more detail you bank, the better the final result.
The Audio Secret: Record From The Source
I get asked constantly why my audio sounds so good. The answer is that I record everything from the source, straight off my Soundcraft Ui24R. I did the same thing with the Ui6 before it. If you have a digital mixer with record capability, use it. If not, record off Serato or Virtual DJ.
Then in post you combine the two. The camera audio gives you the crowd reactions and the room, and you overlay the crispy original-source audio underneath it. This is the single biggest thing missing from most event videos I see online. The footage looks great, but the audio is muffled or blown out. Recording your original source fixes that, and it is absolutely critical.
Do Not Fall Behind On Your Edits
I will say this straight out. If you do not stay ahead on your edits, you will drown. I was once sitting on something like 21 or 22 events that still needed editing (and still have way too high of a number today), and that is a miserable place to be. You can get into a good rhythm with it, but do not let the work pile up. Treat your editing with the same importance as anything else you do for an event.
Getting It All Home: Ingest And Storage
When I get home, the SD cards come out of the cameras first. Any iPhone footage I pull over with AirDrop, which is quicker than USB. Then I pull the USB drive out of the digital mixer. Everything gets dumped onto a 2TB external SSD.
Use an SSD, not a spinner, for your working drive. Working with 4K is intensive and you want that speed. My 2TB drive fits roughly 20 events, though it varies a lot depending on whether I captured just a dance set, or a full ceremony and toasts too. Once an event is fully done, the data moves off to a spinning hard drive for permanent archive. I keep everything: audio on every wedding from 2014 on, and video from 2018 on.
My Final Cut Pro Workflow
Final Cut Pro is my editor of choice, and I use the macOS Photos app as the staging area I ultimately post to social from. When I am working I run three monitors, with my MacBook Pro screen as the color reference for output and two big LGs side by side for a wide workspace.
Folder structure
For each event I create a folder named with the date and the couple’s name, which makes searching painless later. Inside it I create three folders: Originals, Working, and Finals. Everything I recorded goes into Originals: all the camera files, the monogram graphic, the segmented Ui24 audio recordings, and any photos the photographer handed me on the day for safekeeping.
Import, compound clip, and synchronize
In Final Cut I create a new Library, named the same as the folder, saved into Working. I import the media, then build a compound clip for the audio so it is one clean piece. Then I select all the video plus that audio file, right-click, and Synchronize. Final Cut matches the audio cues from the camera to the source audio and lines everything up. It takes a couple of minutes but it is well worth it.
Set your audio levels
My camera audio runs hot, so since it is only there as a secondary track for crowd sound, I drop it to around -6dB. My Soundcraft source audio is recorded deliberately low, which is a good thing, so I bring that up, often to +10 or +12dB. I want to see a little yellow on the peaks here and there, but not a wall of red. Brief red is usually fine. A long stretch of red means trouble.
Keyword collection and projects
To save myself headache, I create a keyword collection called “use” and drag my final synced clip into it, so I am only ever scrubbing the file I actually want. Then I create two projects, both named the same: one horizontal at 1080p (not 1080i) and one vertical at 1080 by 1920. Toggling between them lets me build the horizontal cut, then adapt it for vertical.
Cutting The Long-Form Video
I scrub the whole event first to decide whether it earned a long-format video. Those run anywhere from about two and a half minutes up to five or six if the dance set was really alive.
A few things I lean on while cutting:
Zoom and reposition to fill the frame, since shooting in 4K lets me push in up to roughly 300 percent without losing usable detail. You want to avoid dead air and empty space around your subjects.
Equalize your color before the big edits. Candles on tables and whatever is happening overhead can shift the color from clip to clip. Auto white balance does a decent job, and you can lock a white balance value when filming if the room is steady. I am not chasing perfection here, just good, consistent content.
Keep long-form clips to about five seconds or under. I will stretch to six because I use transitions, which buys a little room. On the copyright front, people can flag a video. Most of the time it just means monetization gets pulled, though you can catch a strike, so I use the smallest segment that conveys the moment.
Use transitions to smooth abrupt changes. Command-T drops in a transition in Final Cut, and a fade handles a hard jump from a slow song into something like “Thunderstruck” while bringing one clip’s audio down and the next one up. Cut on the beat and the whole thing flows.
One real time-saver: copy a clip with Command-C, then Command-Shift-V to paste specific attributes like position and scale onto another clip. That lets me reuse the same zoom and framing across clips without redoing the work.
Making Short-Form Content (Reels, TikTok, Shorts)
Alongside the long cut, I build short-form clips for Instagram and TikTok. Here I will happily make a clip longer than five seconds, because I am not worried about monetization on those platforms. I make both a horizontal and a vertical version.
For vertical, here is my trick to avoid an ugly plain background or black bars. I copy the clip twice. The bottom copy becomes the background: I zoom it to around 315 percent, drop the audio out of it, apply a focus blur at 100 percent, and bring the opacity down to about 25 percent. Then the primary clip sits on top, framed how I want, and you get a soft motion-blur background filling the vertical frame. Not every video needs it, but on the right clip it looks great. I will export, name the file after the song, and drop it into Finals.
I do this anywhere from 5 to 30 times per event. Is it time-consuming? Absolutely. But now I have a deep library of content ready to post at will.
Sharing And Tagging (This Is Where The Real Return Is)
Everything lands in my Photos app, and I post from there. Sometimes from mobile, sometimes from desktop. For desktop scheduling I use Buffer, which has a Reels option, though it can get a little clunky, so I am not always sold on it. The real point is consistency: get content out at least a couple of times a week.
Here is the part that actually drives business. Tag everyone you worked with. The venue, the photographer, the videographer, the caterer. They love seeing content they did not have to produce themselves, it reminds them that you were the one in the room with them, and more often than not they reciprocate by sharing it and sending referrals your way. This ties directly into the relationship-first approach I lay out in my sales process. There is no guarantee, but I have found this pays off again and again.
I use the long-form cuts on my YouTube channel and alongside reviews, and I will sometimes post long form on Facebook and Instagram too. Short form tends to perform better on Instagram and TikTok, but it is good to mix it up. I will even run long-form content in a vertical reel format with the couple’s name and date overlaid, which gives me room to dress it up natively on each platform rather than leaving everything plain.
My Equipment Rundown
Note: the prices below were accurate at the original time of writing and are due for a refresh. Check the linked product pages for current pricing.
- Camera (x2): Sony ZV-1 (the original, Generation 1, not the ZV-1 II): $748
- Gimbal: Zhiyun Crane M2S Camera Gimbal: $199
- Video Working Drive: SanDisk 2TB Pro-G40: $249
- Video Archive Drive: Western Digital 5TB Elements HDD: $119
- SD Card (x4): SanDisk Ultra 256GB: $36
- Cage: SmallRig ZV-1: $40
- Camera Plate: Desmond DP-25: $9
- Quick Release: Neewer Mini Fishbone: $17
- Battery: ULANZI BG-3 10,000mAh Battery Handle Grip: $49
- Dummy Battery: DK-X1 Coupler: $18
- Tripod: SmallRig 68″ Tripod: $59
- Tripod Head: Neewer Ball Head: $35
- Software: Final Cut Pro: $300
Newer additions (added since the original video):
- Pocket Gimbal Camera: DJI Osmo Pocket 3: $539
- Action Camera: DJI Osmo Action 5 Pro: $469
ZV-1 Quick Reference Guide
(Settings for the original Generation 1 Sony ZV-1)
- Movie1/1: Exposure Mode: Shutter Priority (30)
- Movie1/1: File Format: XAVC S 4K
- Movie1/1: Record Setting: 30p 60M
- Movie1/1: Quality: Fine
- Movie1/2: AF drive speed: Fast
- Movie1/3: Audio Level Display: On
- Movie1/3: SteadyShot: Standard
- Movie1/4: REC Lamp: On
- Movie1/6: Zoom Setting: Optical Only
- Setup2/8: Auto Power OFF Temp: High
- Function: ISO: Auto
- Function: AF-C
- Function: Center weight focus
- Function: Audio Level 18